Acadify EDU ERP – School Management System (Website, Admin Panel & Student/Teacher App)
Setup & Configuration
Reference for every server: installer, .env, updates, live chat, mail, languages, themes, roles and teachers
Choose Your Hosting
Installation and updates are described step by step in two separate guides. Each one is complete on its own: pick the one that matches your server and follow it from top to bottom. This page is the shared reference that both guides link to.
| cPanel / shared hosting | VPS | |
|---|---|---|
| Website, admin panel, API for the app | Yes | Yes |
| Terminal needed | No (File Manager and Cron Jobs are enough) | Yes (SSH) |
| PHP | 8.3, chosen in MultiPHP Manager or Select PHP Version | php8.3-fpm |
| Document root | acadify/public via Domains | /var/www/acadify/public in the nginx or Apache site |
| Live chat | Works, refreshes every 10 seconds | Real time with Laravel Reverb (or the same 10-second refresh) |
| Recommended update | Manual update: File Manager, then Finalize manual update | System Update ZIP upload, or php artisan acadify:upgrade |
Already have Acadify and want a newer version? Both guides end with an Updating part, including the first upgrade from 1.0.0 to 1.2.0. How the updater works is explained under System Update below.
Web Installer
A site that is not installed yet redirects every page to /install. The page only opens once .env exists with an APP_KEY (both guides show how, with or without a terminal). It has two parts:
- Requirements: PHP version, MySQLi, cURL, GD,
allow_url_fopen,date.timezoneand the writable folders (routes,resources,public,storage,.env). Fix anything marked red and reload. - Database and administrator: database host, user, password and name; then the administrator’s first name, last name, email and password. Click Finish.
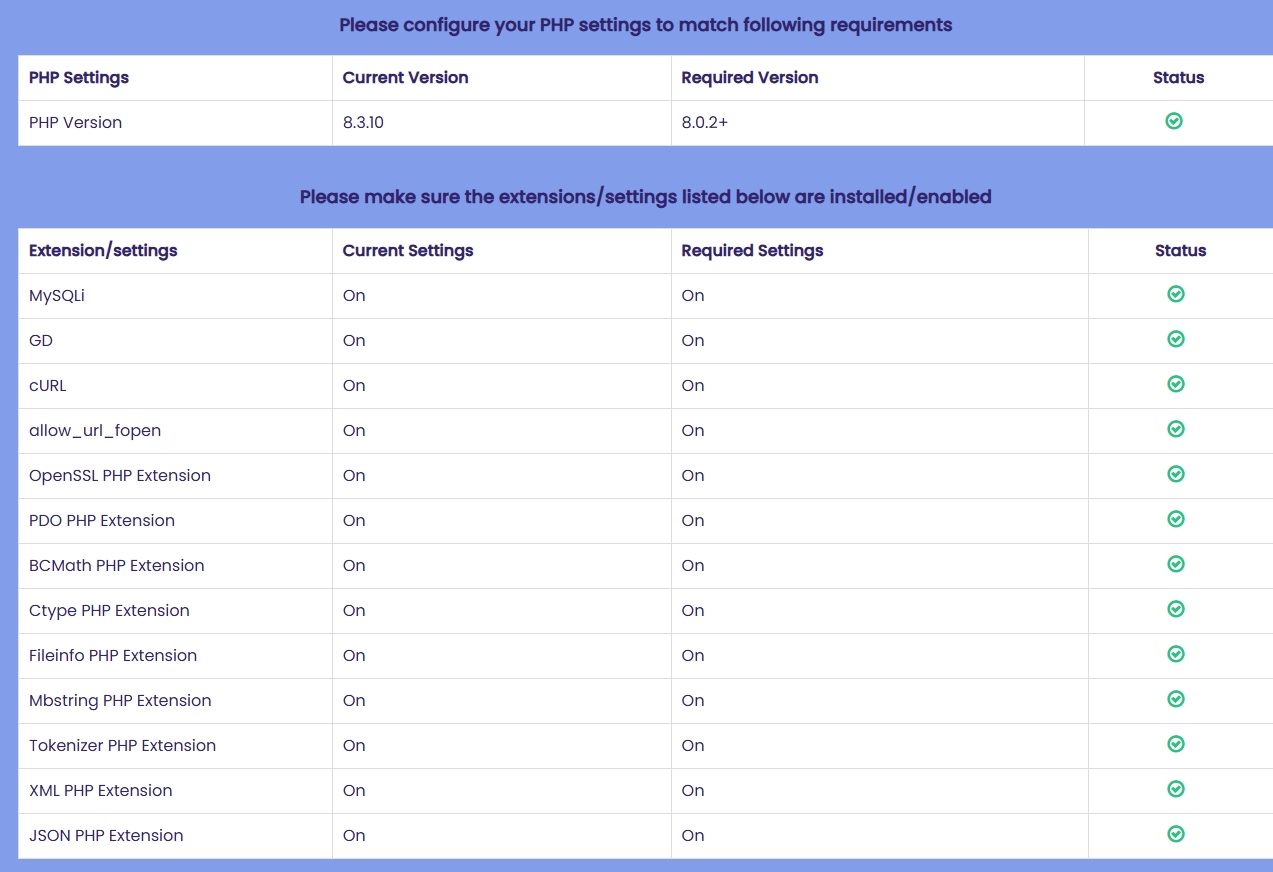
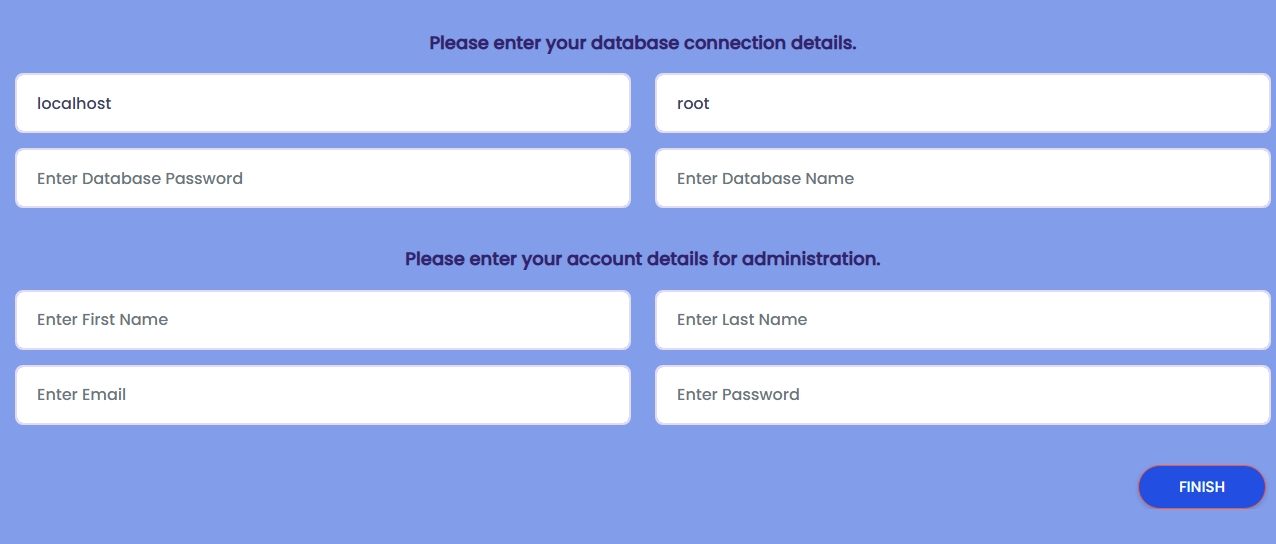
The installer tests the database connection, writes DB_HOST, DB_DATABASE, DB_USERNAME and DB_PASSWORD to .env, creates the tables
and the default data (roles and permissions, languages, settings, website sections), turns the first user into your administrator and sets APP_INSTALLED=yes.
It can take a minute; keep the page open. Then sign in at /login.
Use 127.0.0.1 as the database host. If the connection fails with localhost, the installer tells you to switch.
Never run the installer again on a site that holds real data, and never run php artisan db:seed on a live site: both rebuild the database.
First Login and First Steps
Sign in with the email and password you entered in the installer. Recommended order:
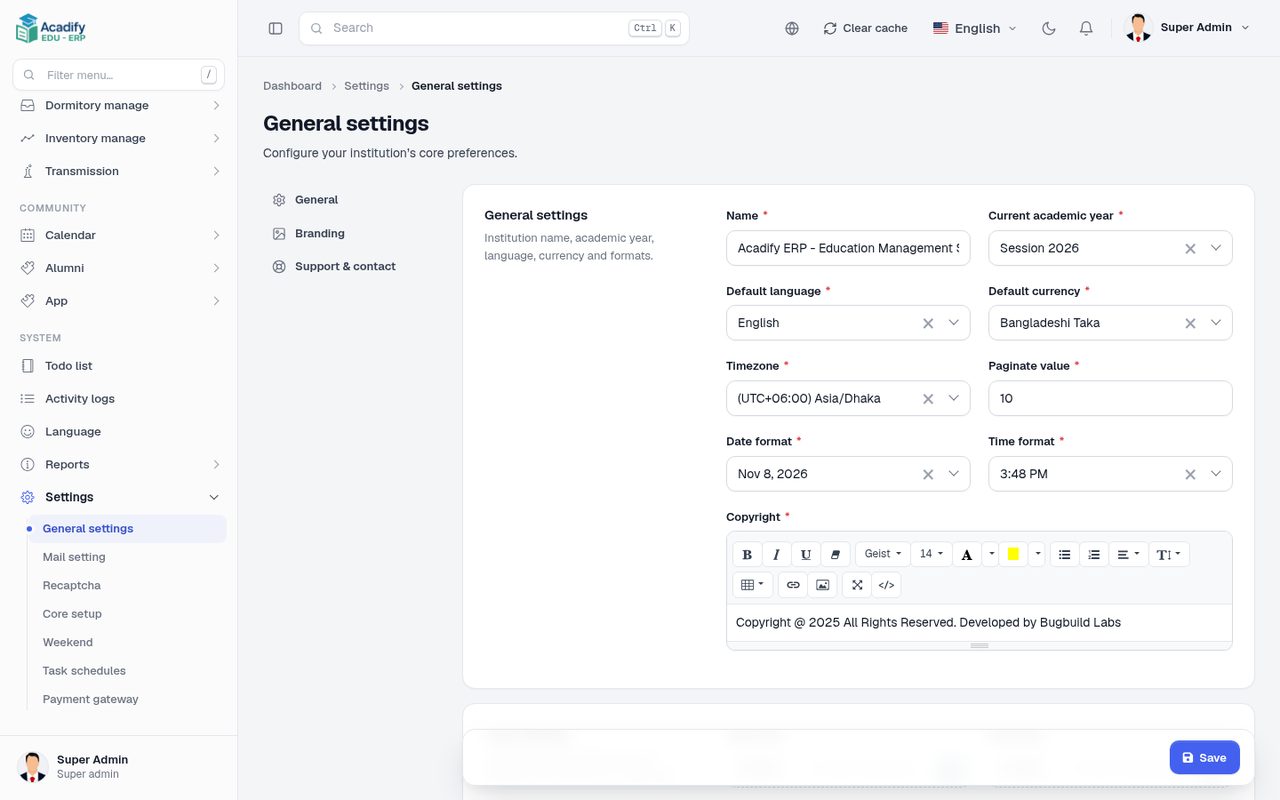
- : the General tab (school name, default language, currency, time zone, date and time format, copyright), Branding (logos and favicon) and Support & contact.
- : SMTP, so password-reset codes and email templates can be sent (Mail).
- , then choose it as Current academic year in General settings. Teachers only see the assignments of the current academic year.
- Classes, sections, subjects, teachers and class teachers: see Setting up a school and Teacher assignments.
- : theme, colours, WhatsApp and Facebook buttons, live chat (Themes).
Cron, Queue and Caches
Cron
One cron job runs Laravel’s scheduler every minute; it runs exam:result-generate once a day. The exact command depends on the server:
cPanel (Cron Jobs, full PHP 8.3 path) or VPS (www-data crontab).
shows the scheduled tasks.
Queue
The package ships with QUEUE_CONNECTION=sync: one-time codes and emails are sent during the request, so no queue worker is needed. Keep it that way unless you run a
worker (php artisan queue:work) under Supervisor.
Caches
Settings are cached. After editing .env or uploading new files run php artisan optimize:clear (on a VPS as sudo -u www-data php artisan optimize:clear).
Without a terminal, the Clear cache button in the admin top bar does the same from the browser.
.env Reference
| Key | What it does |
|---|---|
APP_NAME, APP_URL | Name used in emails; your full site address (with https). |
APP_DEBUG | false on a live site. Set true only briefly to see an error. |
APP_DEMO | false on your site. true turns on demo data seeding, demo login buttons, the public Customize panel and the fixed one-time code 1111; it also blocks System Update. |
APP_INSTALLED | Set to yes by the installer. |
DB_* | Database connection (written by the installer). |
QUEUE_CONNECTION | sync (default, no worker needed). |
BROADCAST_DRIVER, REVERB_* | Real-time live chat (Live chat). Any driver other than reverb means the chat refreshes every 10 seconds. |
JWT_SECRET, JWT_TTL, JWT_REFRESH_TTL | Mobile app login tokens: the signing key (php artisan jwt:secret), token life in minutes (60) and refresh window in minutes (10080 = 7 days). |
MAIL_* | Defaults only. The mail settings that are used are the ones in . |
Run php artisan optimize:clear after every change.
How System Update Works
From 1.2.0 on, Acadify updates itself. Every release ships as the same complete WebSourceCode folder you installed from, with a version file (acadify-update.json).
The page is (super admin only). Step-by-step instructions, including the first upgrade from 1.0.0 to 1.2.0:
php artisan acadify:upgrade.Open
The three ways
| Way | What you do |
|---|---|
| Automatic update | Upload the WebSourceCode ZIP (about 150 MB) under Automatic update and click Install update. Needs PHP upload limits above the ZIP size; the Server check on the page tells you. |
| Manual update | Copy the new files over the site (File Manager, FTP or rsync), sign in and click Finalize manual update. Admin pages send the super admin to System Update until this is done. |
| Command line | Copy the files, then php artisan acadify:upgrade. Works on demo sites too. |
What an update does
- Checks the ZIP (safe paths, size), the version (must be newer than the installed one) and the server before any file is replaced. A problem stops it with “Nothing was changed”.
- Automatic update only: maintenance mode, a copy of each replaced folder in
storage/app/updates/backups/, and phrases you edited under Language are kept (only new phrases are added). - Then, for all three ways: database migrations, new permissions for the Super admin role, new default settings (existing values are never changed), shipped languages, the
public/storagelink, clearing caches, and finally recording the new version. The steps are listed on the page and kept instorage/app/updates/logs/. - Never overwritten:
.env,storage/,public/uploads/(andvendor/by the automatic update). - A site without a stored version (any 1.0.0 site) is treated as 1.0.0, and any older version updates to the latest in one run.
- Run database sync applies migrations, permissions and default settings without changing the version. It is safe at any time.
- On a site in demo mode (
APP_DEMO=true) the page is locked; use the command line there.
Back up the database and the files before every update. Never run the installer, php artisan db:seed or a demo seeder on a live site.
Update the mobile app at the same time: build the new app from AppSourceCode (Mobile App).
Live Chat and Laravel Reverb
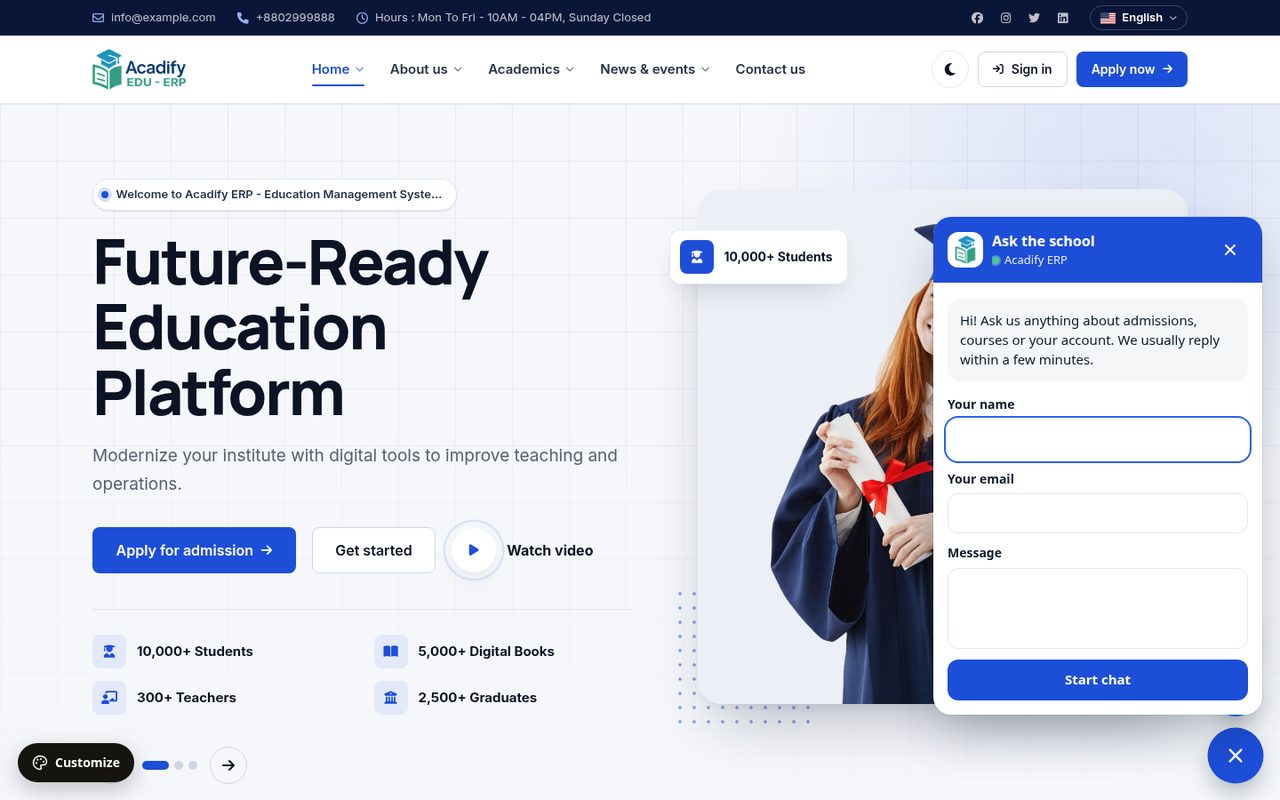
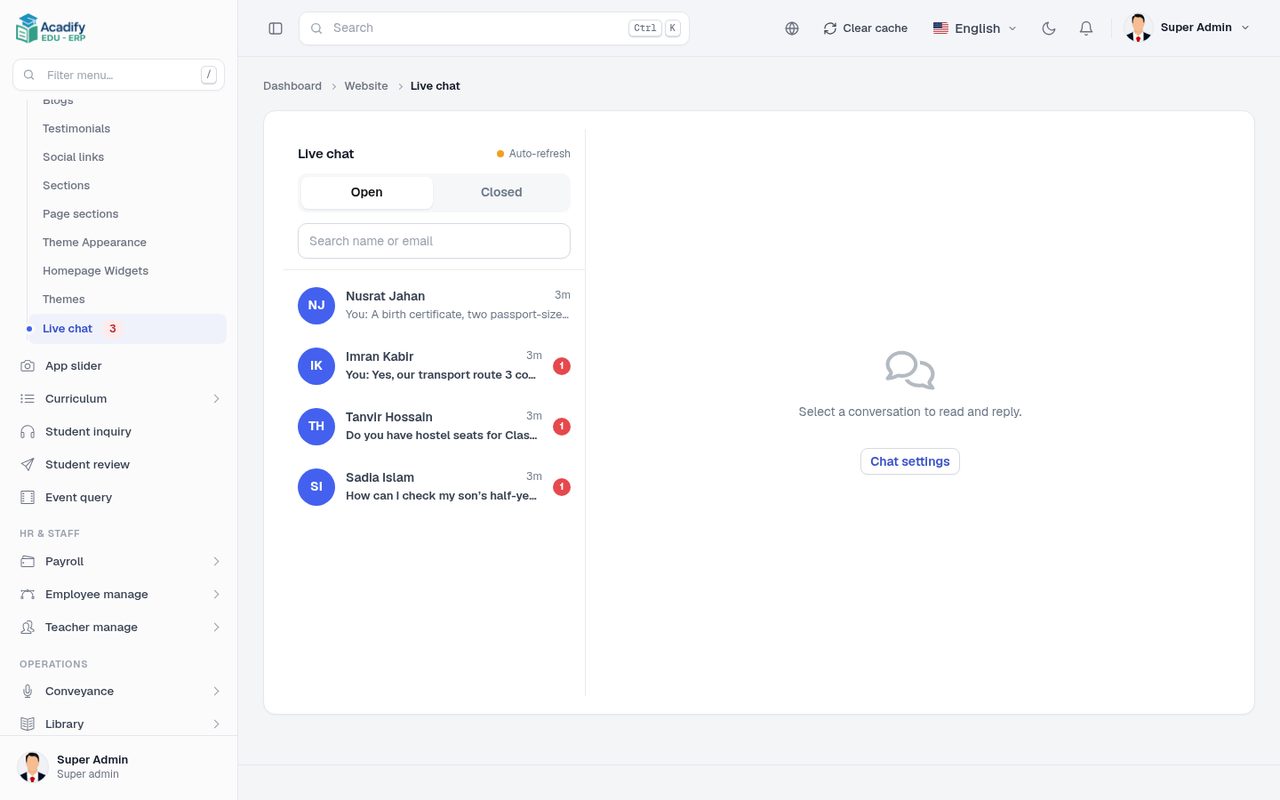
Visitors write to the school from a chat button on every page of the website. Guests give a name and email with their first message; signed-in users are recognised. Staff answer in , with unread counts and open/closed conversations. Spam protection is built in (rate limits, a hidden honeypot field, at most 5 new conversations per IP per hour).
Turn it on and off
: Show live chat, the chat title and the greeting. The box under the switch shows whether the real-time server is configured.
Real time with Laravel Reverb
Without Reverb the widget and the inbox refresh every 10 seconds and nothing else is needed; that is how it runs on cPanel and shared hosting. For instant messages, run Reverb, the WebSocket server that ships with Laravel. On a VPS this takes three parts, all in VPS guide, step 12:
BROADCAST_DRIVER=reverband theREVERB_keys in.env(see the .env reference).- Supervisor keeps
php artisan reverb:startrunning. - nginx or Apache passes the WebSocket paths
/app/and/apps/to Reverb.
When it works, the Themes page says “Realtime (Reverb) is on” and the inbox header shows Live instead of Auto-refresh.
Shared hosting usually cannot keep a process like Reverb running. Leave BROADCAST_DRIVER=log: the chat works by refreshing every 10 seconds.
Mail (SMTP)
: mail driver (SMTP or sendmail), host, port, username, password, encryption, from address, from name and the signature used in emails. These values are stored in the database and used for every email, including password-reset codes for the website and the app.
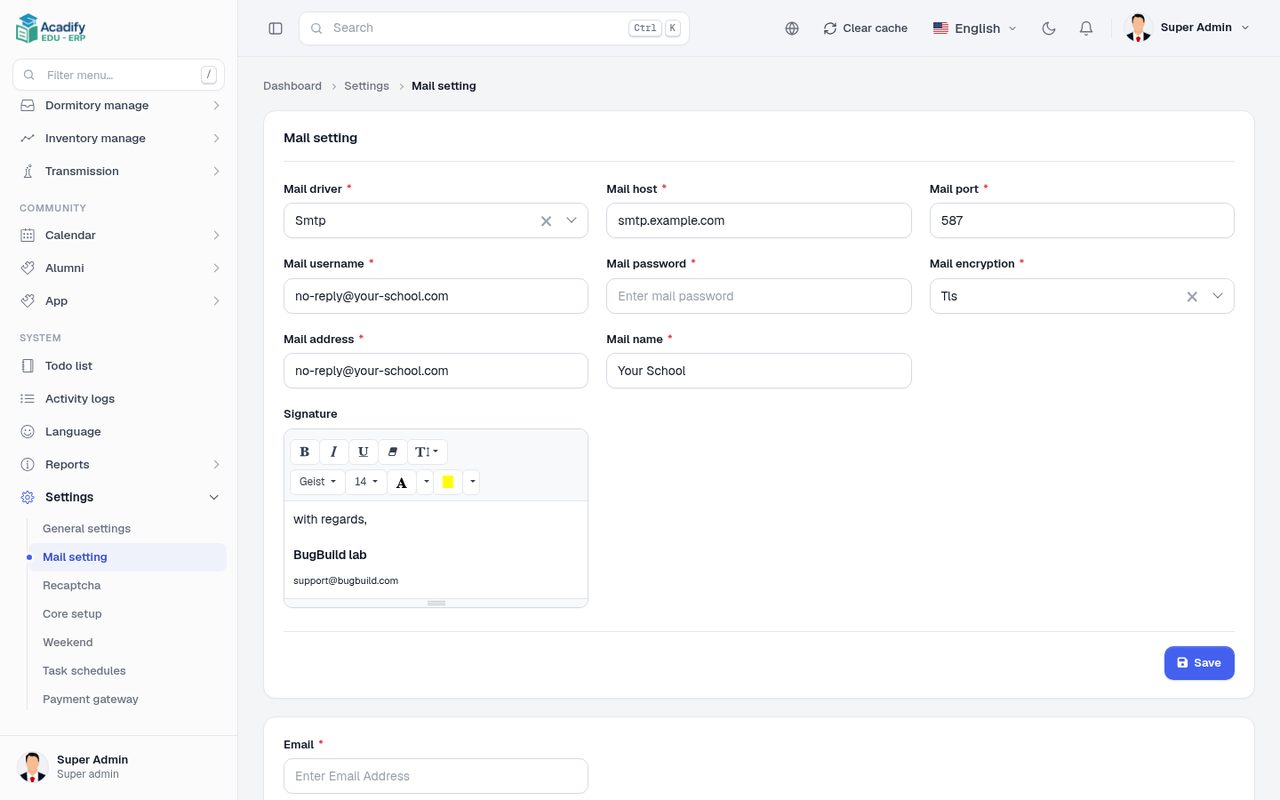
Typical values: port 587 with tls, or 465 with ssl. Use an address on your own domain as the from address. To test, use
and check .
SMS
holds reusable texts, sends a message and lists what was sent. Sending uses the built-in AlphaSMS gateway integration. Phone-number one-time codes in the app are sent the same way; email codes use the mail settings.
SMS gateways are paid third-party services and are not included in the item price. Contact support if you need help connecting your gateway account.
Languages and Right-to-Left
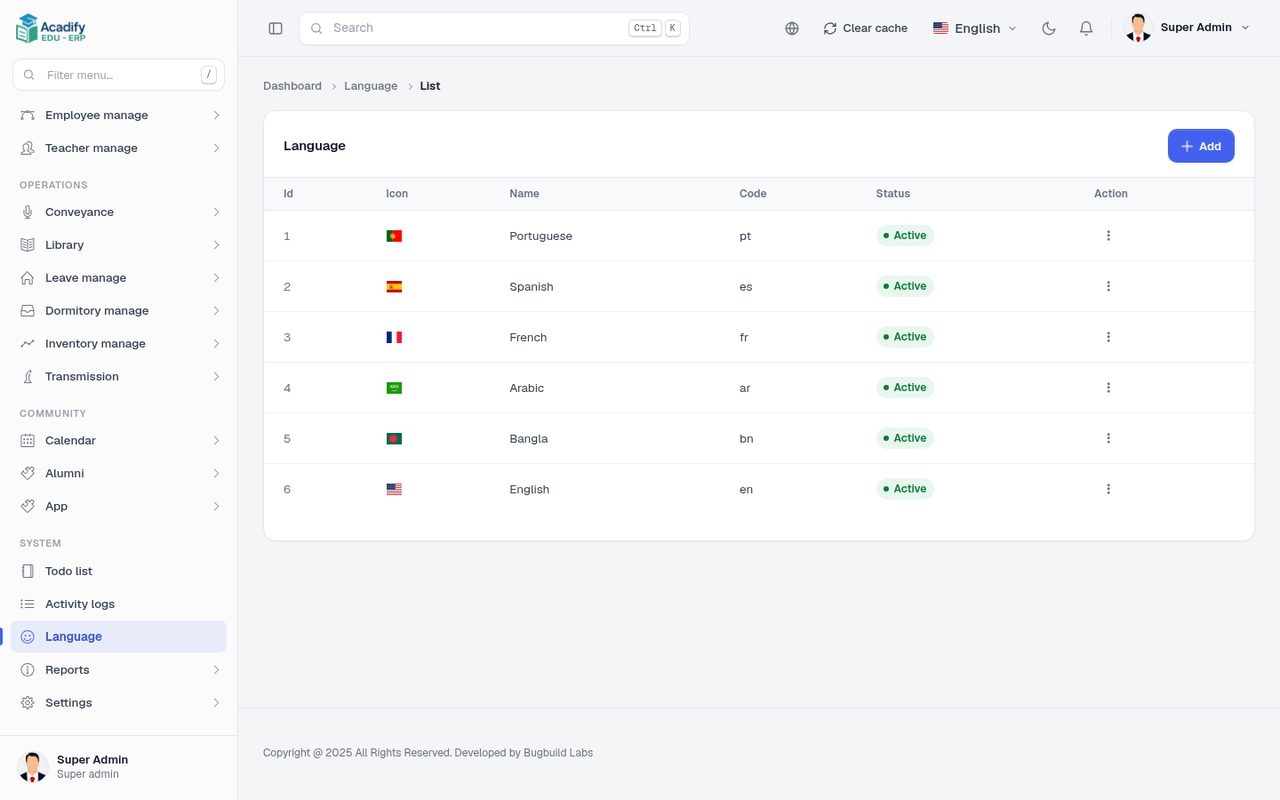
English, Bangla, Arabic, Spanish, French and Portuguese are installed. Manage them in (sidebar, System group):
- Add a language: name, code (for example
de), flag, text direction (LTR or RTL) and status. - Edit phrases: pick a module (menus, labels, website themes, app texts and so on) and translate each phrase. The app downloads its texts from your site, so phrases you change here appear in the app too.
- Default language: . Visitors and users switch language from the language menu in the header.
Arabic shows how right-to-left works: the website, the admin panel and the app all mirror their layout for an RTL language.
Website Themes
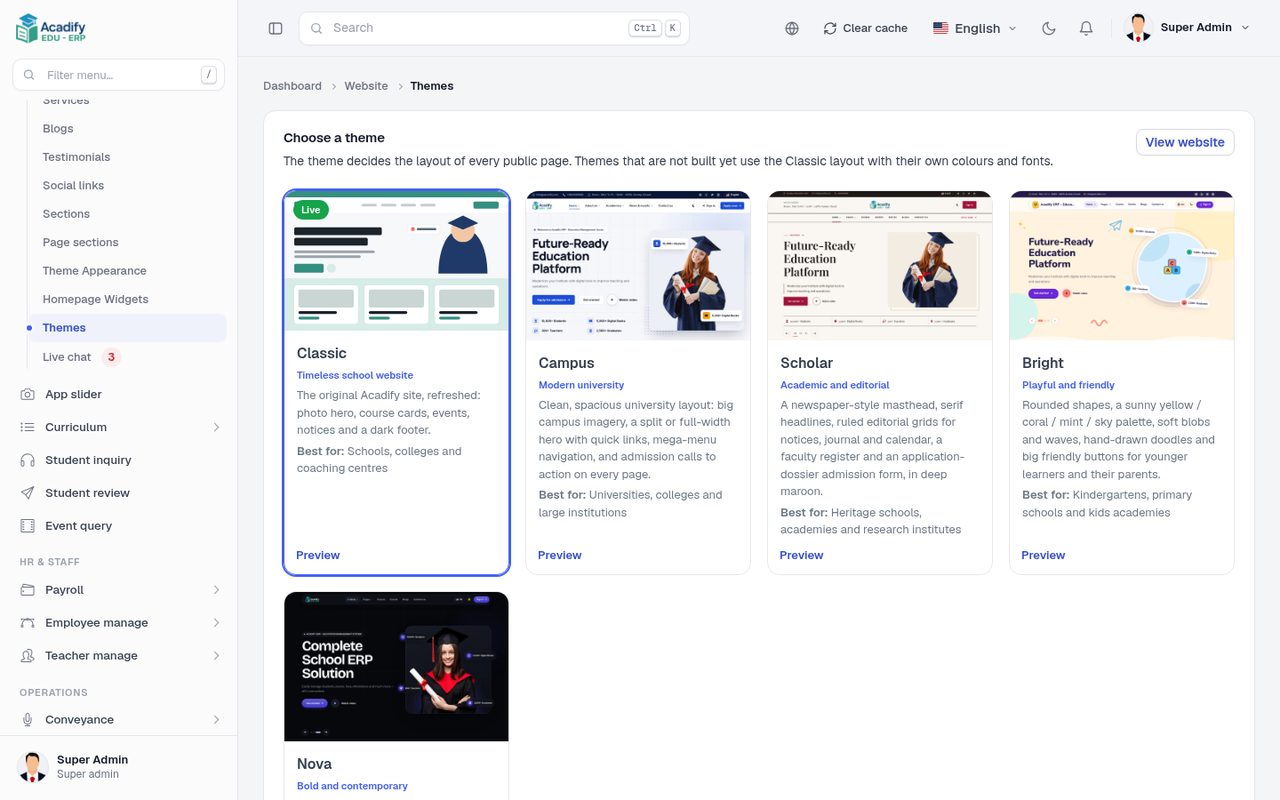
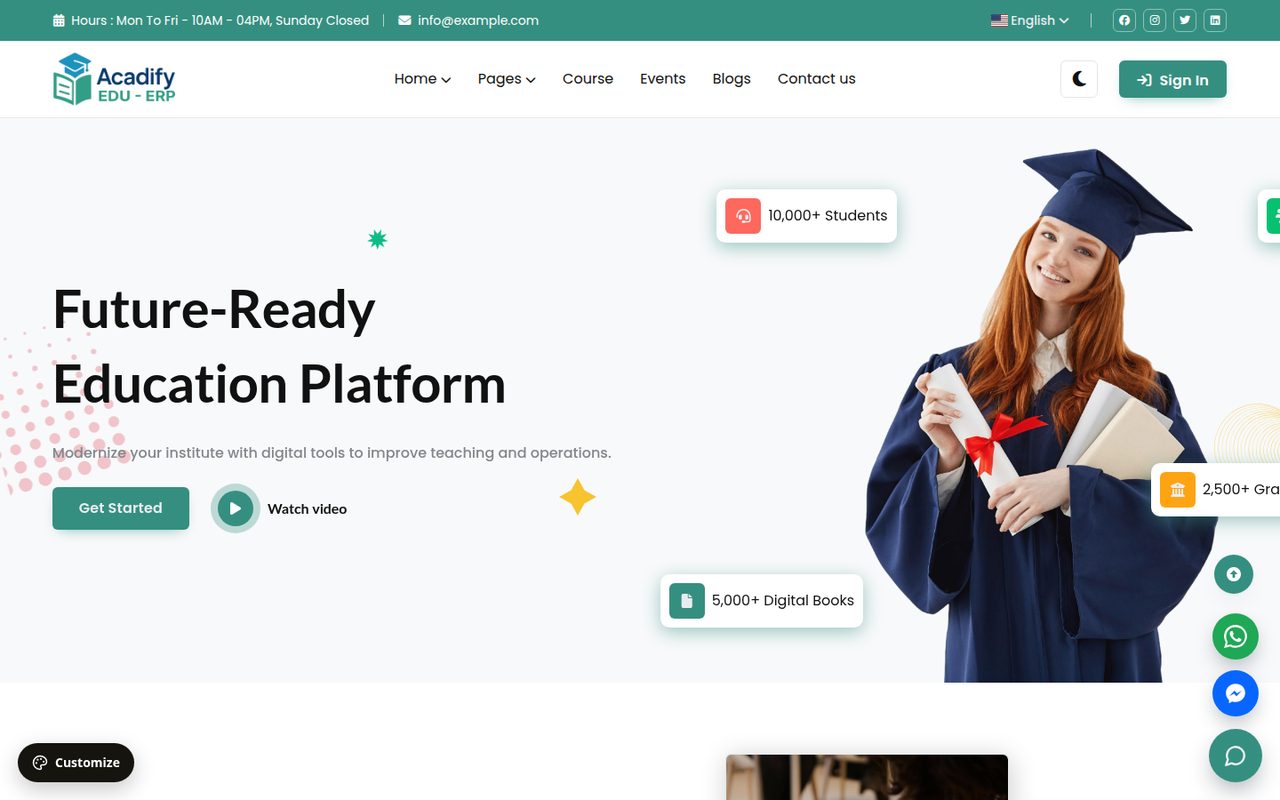
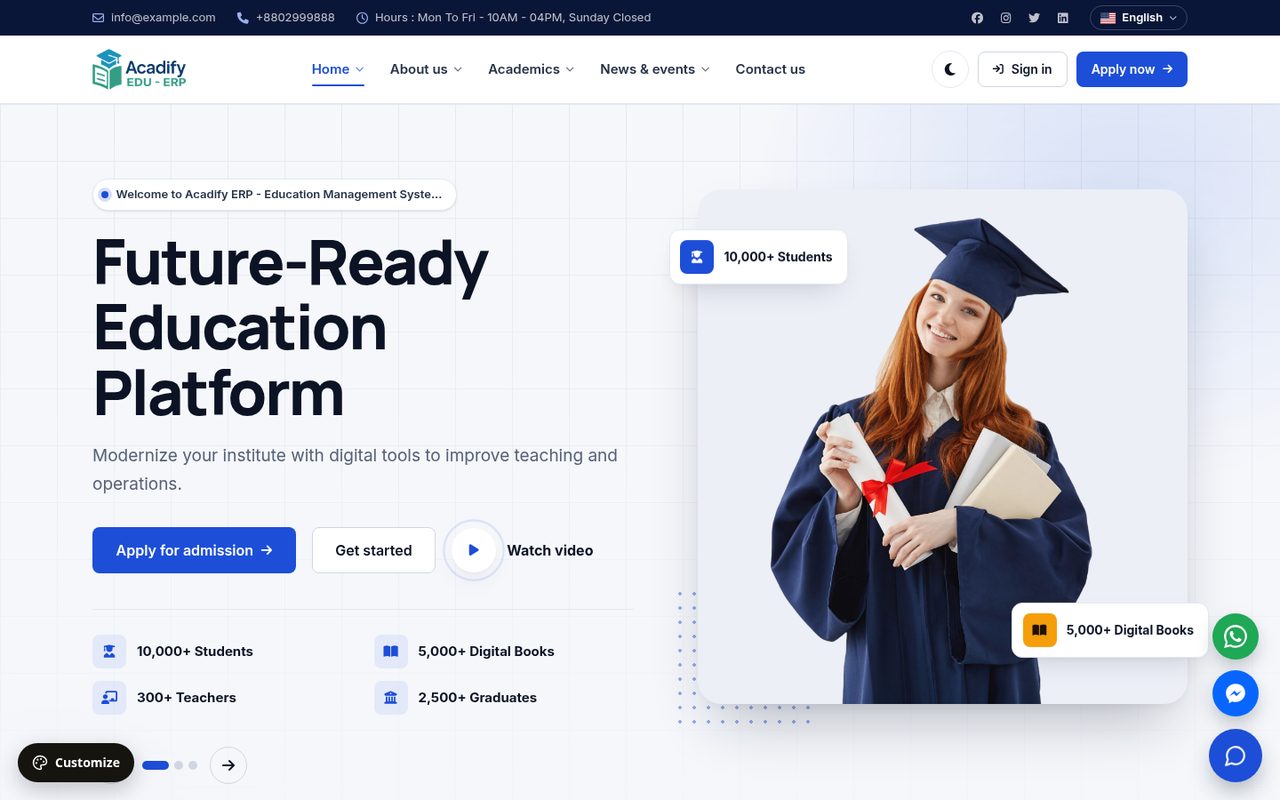
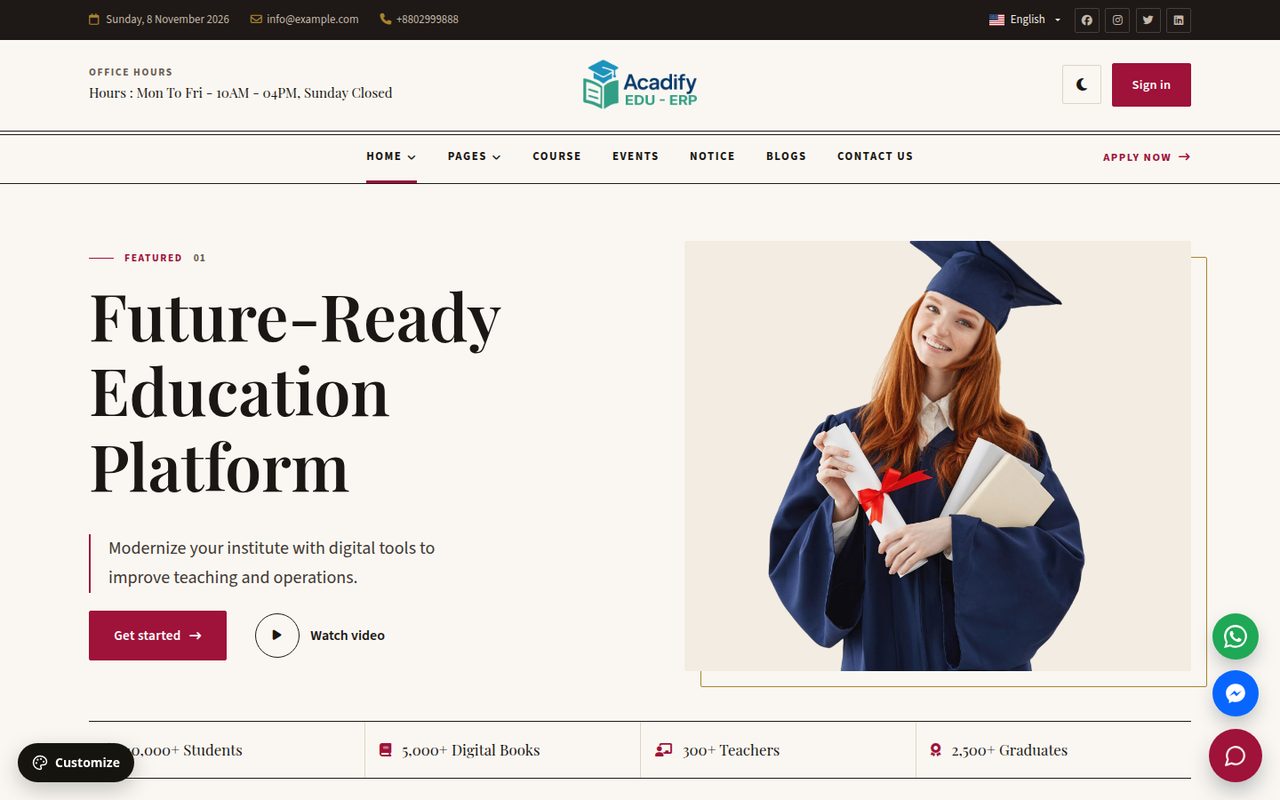
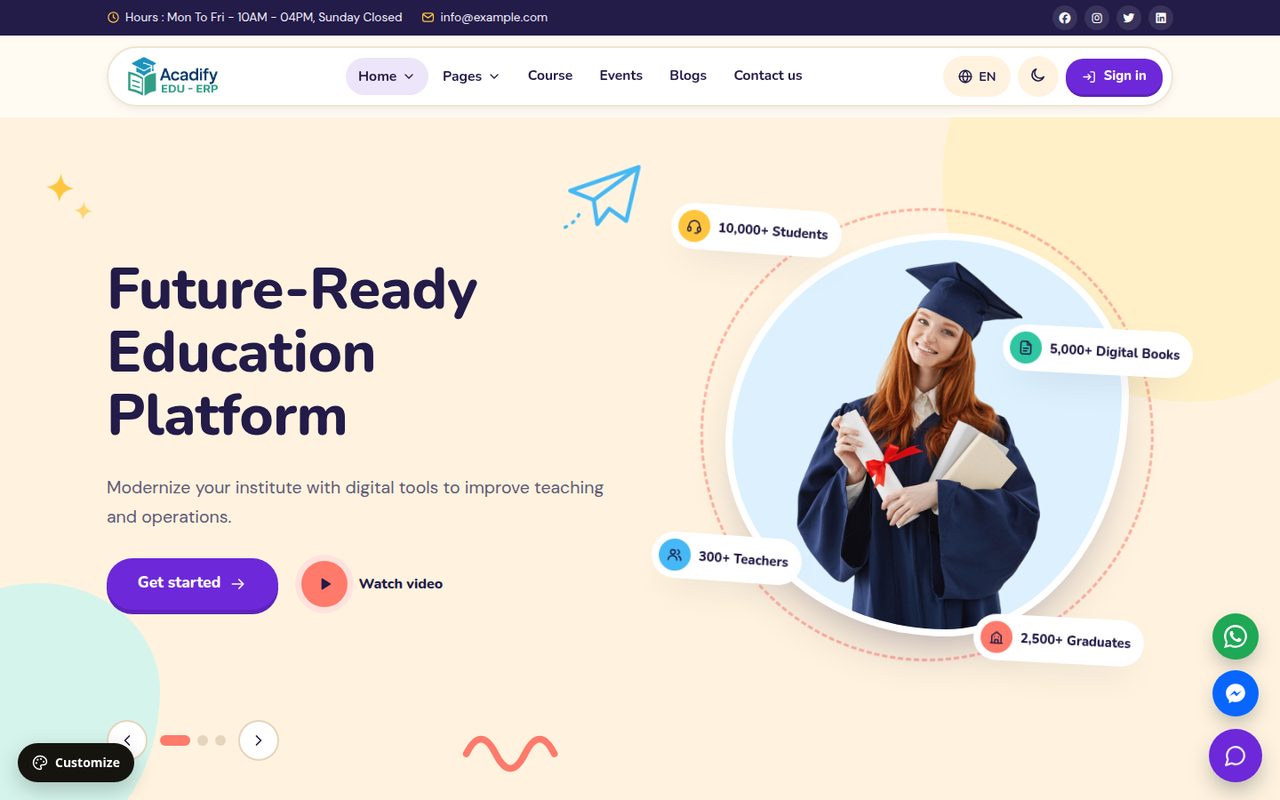
Choose the website’s look in . Every theme redesigns every public page; the content (sliders, sections, notices, events, blogs, courses) is shared, so you can switch at any time.
| Theme | Style | Best for |
|---|---|---|
| Classic | The original Acadify site, refreshed: photo hero, course cards, events, notices and a dark footer | Schools, colleges and coaching centres |
| Campus | Clean, spacious university layout, big campus imagery, mega-menu navigation, admission calls to action, bold blue | Universities, colleges and large institutions |
| Scholar | Newspaper-style masthead, serif headlines, editorial grids, deep maroon | Heritage schools, academies and research institutes |
| Bright | Rounded shapes, sunny palette, soft blobs and doodles, big friendly buttons | Kindergartens, primary schools and kids academies |
| Nova | High-contrast dark canvas, oversized type, bento-grid sections | Coding schools, online academies and training centres |
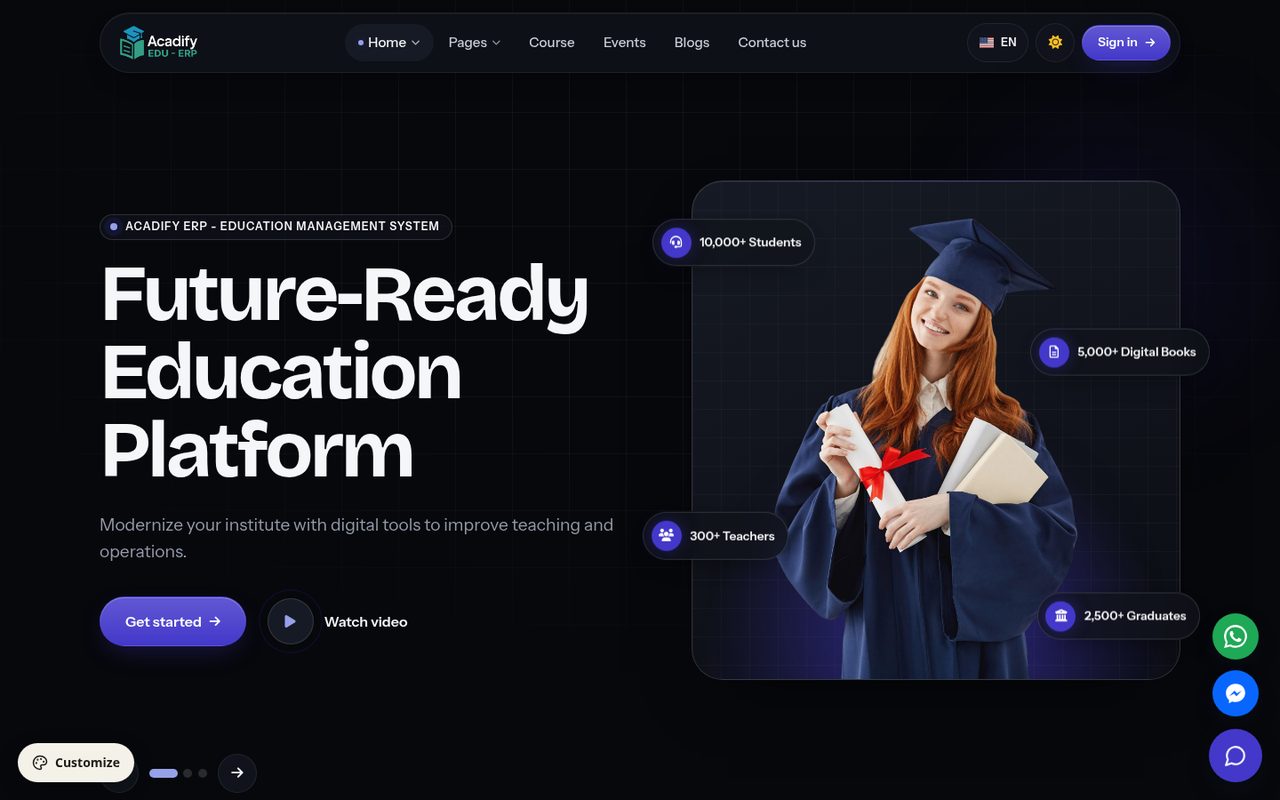
Switch the theme
- Click Preview on a theme card to open the website in that theme for yourself only.
- Select the card and press Save to make it the theme for every visitor.
While logged in as an administrator you can also preview any theme with /?theme=campus (classic, campus, scholar, bright or nova); /?theme=off ends the preview.
Appearance
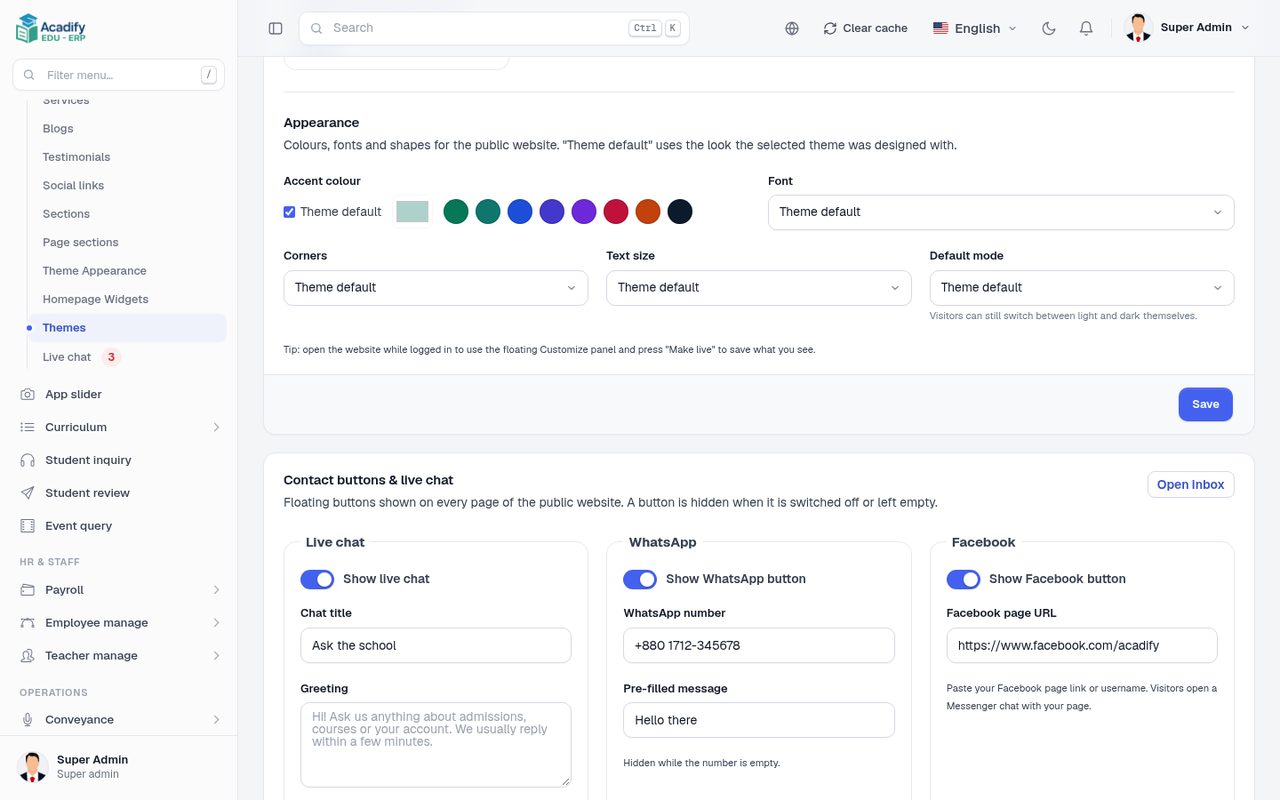
Under Appearance on the same page: accent colour, font, corners, text size and default mode (light or dark). “Theme default” uses the look each theme was designed with. Visitors can still switch between light and dark themselves. The accent colour you pick here is also the colour of the mobile app.
Content
Homepage and page content: , , , , , , , , ; events in ; the gallery in ; courses in .
Customize Panel and Demo Mode
When you are signed in as an administrator, a Customize button appears at the bottom-left of the website. It opens a panel to try theme, mode, accent colour, font, corners and text size live. Changes are a preview for you only; press Make live to save the appearance for all visitors.
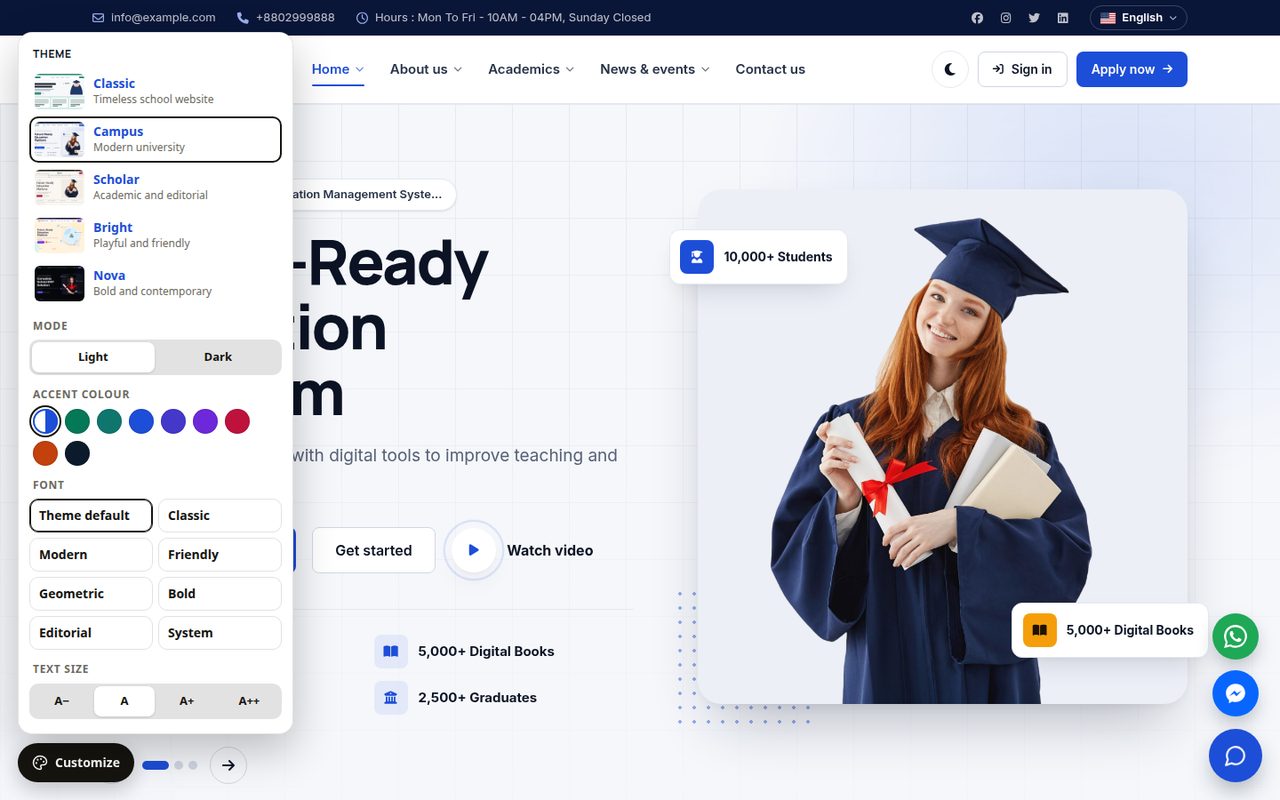
Ordinary visitors never see the panel on your site. On a server in demo mode (APP_DEMO=true) every visitor gets it, so they can try the themes; their choices
stay in their own browser session. Keep APP_DEMO=false on your own site.
WhatsApp and Facebook Buttons
:
- WhatsApp: the number with country code (for example
+8801712345678) and an optional pre-filled message. The button openshttps://wa.me/<number>. - Facebook: your page URL (
https://facebook.com/yourschool) or username. The button opens a Messenger chat with your page.
Each button is hidden when its switch is off or its field is empty. Press Save under the box.
Roles and Permissions
lists the roles (Super admin, Admin, Teacher, Student, Parent, Librarian, Receptionist and any you add). Create or edit a role and tick what it may read, create, update and delete, module by module.
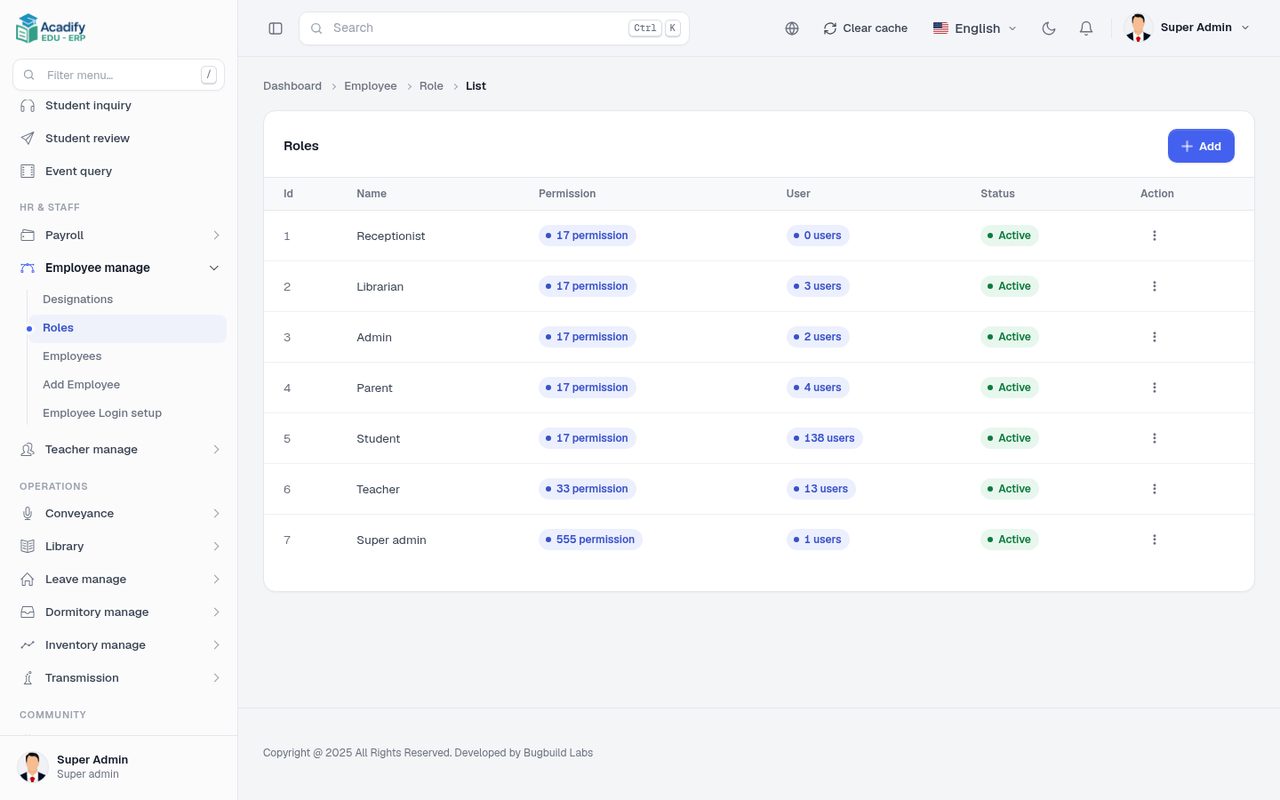
- A user gets the permissions of their role when the account is created or when their role is changed. Editing a role later does not change existing users’ permissions, and editing a user’s profile keeps their permissions.
- Teacher, Student and Parent are fixed roles: they decide which panel the person sees (teacher panel, student portal, parent portal, or the student/teacher experience in the app).
- The Teacher role includes the teaching permissions (attendance, homework, exam schedule, marks, leave, timetable). Teachers still only see records of their own assignments.
- Login details for portals: , and .
Teacher Assignments and Class Teachers
The teacher panel and the teacher app show a teacher only what is assigned to them for the current academic year. There are two kinds of assignment:
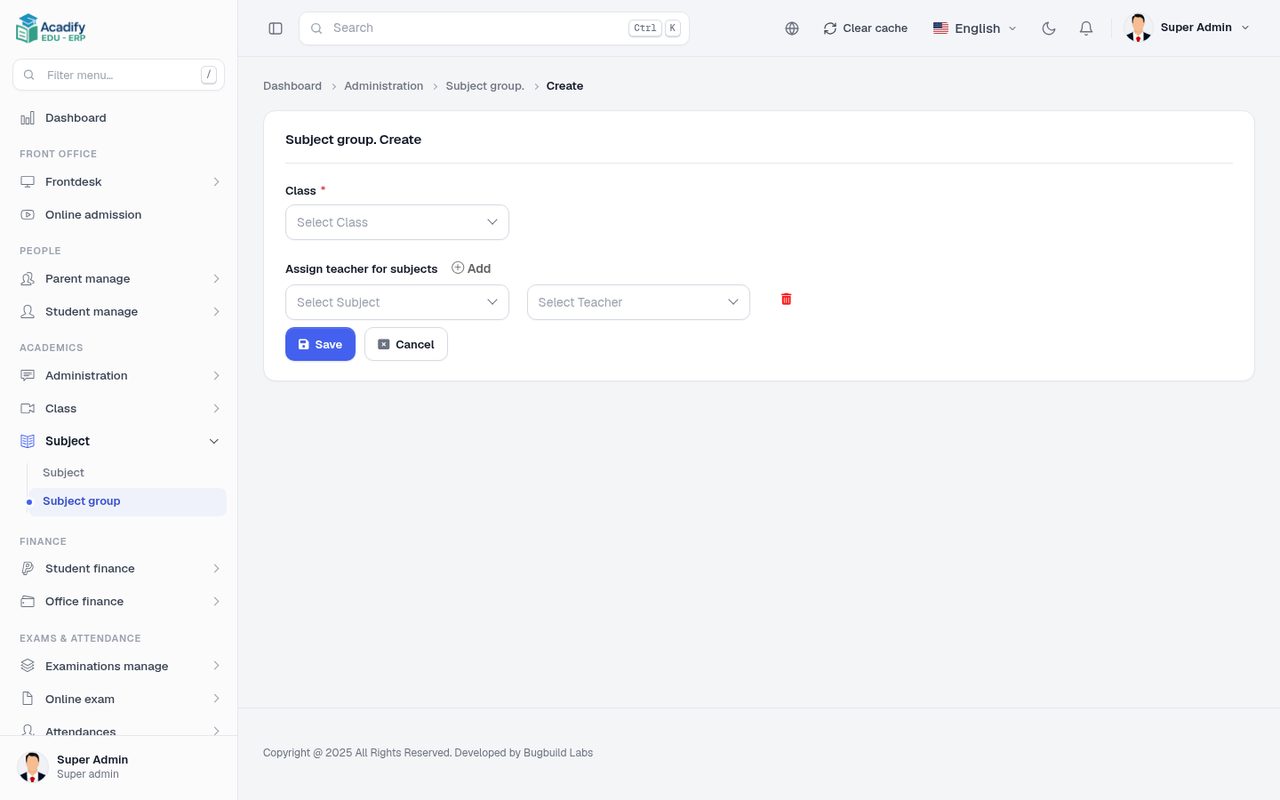
Subject teachers — Subject → Subject group
Create a subject group for a class context (class, section, shift, group, department) and, under Assign teacher for subjects, choose the teacher for each subject. This decides which classes and subjects a teacher sees: rosters, homework, exam schedule, marks entry and timetable.
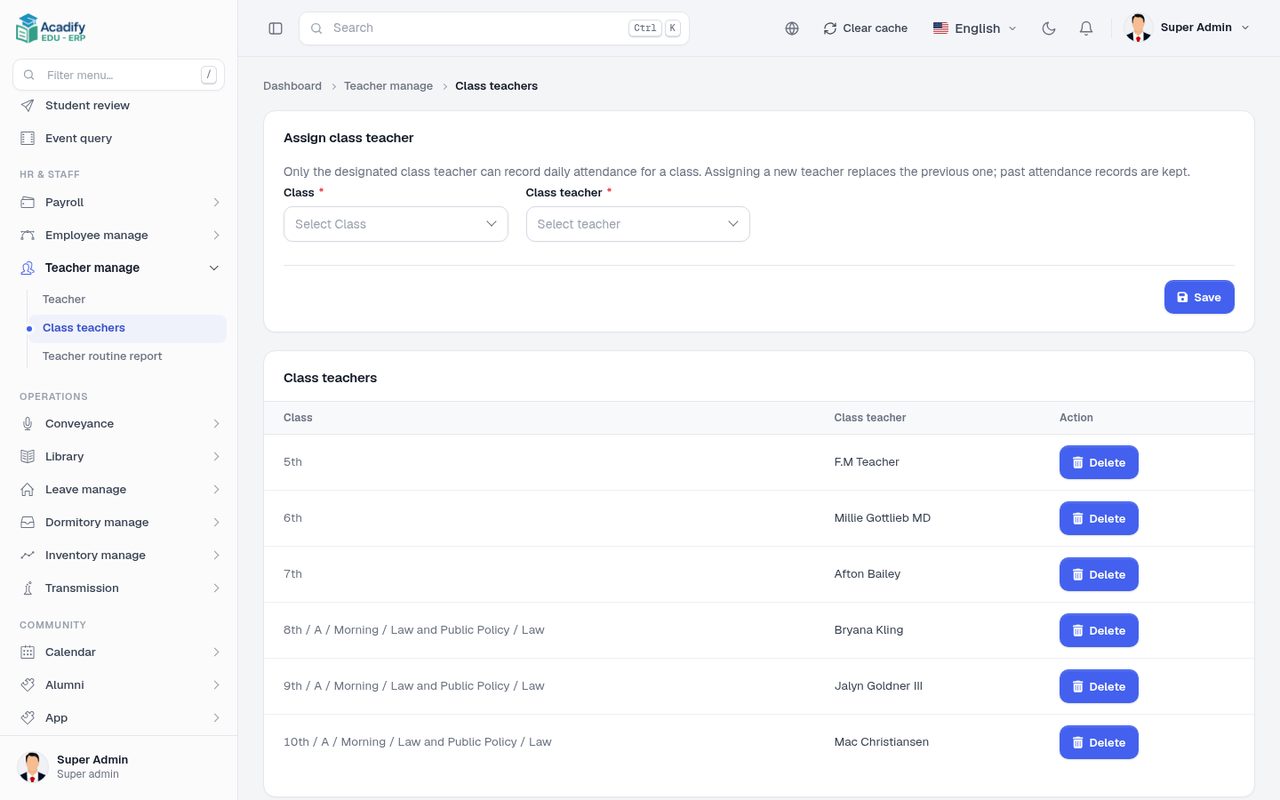
Class teachers — Teacher manage → Class teachers
Pick class, section, shift, group, department and the class teacher. Only the class teacher can take daily attendance for that class. Assigning a new teacher replaces the previous one; attendance already recorded stays.
A teacher with no assignments sees an empty panel with a message, never other teachers’ classes. If a teacher sees nothing, check that the subject group belongs to the current academic year and that the teacher account has the role Teacher.
Course Payments
The website’s course checkout can take card payments through Stripe or a bank transfer. Enter your Stripe keys and the bank details shown to buyers in , and switch each one on or off. Orders appear in .
Stripe is a third-party service with its own fees. The package ships with placeholder keys only; enter your own before you switch it on.
SSL (HTTPS)
Use HTTPS for the website: the mobile app expects an https:// address, and real-time chat over wss:// needs it.
- cPanel: SSL/TLS Status → Run AutoSSL (cPanel guide, step 7).
- VPS:
sudo certbot --nginx -d school.example.comor--apache(VPS guide, step 9).
Then set APP_URL=https://… in .env and clear the cache.
Backups
Back up the database and public/uploads/ (photos, logos, documents) regularly, and always before an update:
mysqldump -u acadify -p acadify | gzip > ~/backups/acadify-$(date +%F).sql.gz
tar -czf ~/backups/acadify-uploads-$(date +%F).tar.gz -C /var/www/acadify public/uploads .env
On cPanel, Backup or JetBackup does the same.
Troubleshooting
| Problem | Fix |
|---|---|
Every page redirects to /install | The database cannot be reached or APP_INSTALLED is not yes. Check the DB_* values and APP_INSTALLED=yes in .env, then clear the cache. |
| “No application encryption key” | APP_KEY in .env is empty. Run php artisan key:generate, or on cPanel without a terminal enter a 32-character value (cPanel guide, step 5). |
| “Composer detected issues in your platform” | The site runs on an older PHP. Choose PHP 8.3 (cPanel: MultiPHP Manager; VPS: php8.3-fpm). |
| The installer shows red items | Set date.timezone and allow_url_fopen in php.ini, enable the missing extension, make the listed folders writable. |
| 500 error | Read the last lines of storage/logs/laravel.log. Most often: folder permissions (on a VPS, artisan run as root instead of www-data), a missing PHP extension, or a stale cache (php artisan optimize:clear). |
| Images or logos do not show | Check APP_URL (https, no trailing slash) and that public/uploads is writable: Acadify stores every upload there. |
| App: “could not connect” or login fails | The app address must end in /api/v1 and use HTTPS. Check JWT_SECRET is set (php artisan jwt:secret). |
| Password-reset code never arrives | Check and , and that QUEUE_CONNECTION=sync. |
| A teacher sees no classes | Assign subjects in for the current academic year; for attendance, make them class teacher. After upgrading from 1.0.0, finish the update (Finalize manual update or php artisan acadify:upgrade). |
| Chat says Auto-refresh instead of Live | Reverb is not reachable: check BROADCAST_DRIVER=reverb, the REVERB_* values, sudo supervisorctl status acadify-reverb and the /app/ proxy (VPS guide, step 12). The chat still works by polling. |
| Changed settings do not appear | Press Clear cache in the admin top bar or run php artisan optimize:clear. |
Go-Live Checklist
APP_DEBUG=false,APP_DEMO=false,APP_URLwith https.- Mail settings tested; school name, logo, favicon, time zone and currency set.
- Current academic year selected; teachers assigned to subjects and class teachers chosen.
- Cron job added; backups scheduled.
- The app built with your own package ID, name, icon and signing key, pointing at your HTTPS address.